Seed Actions—Add Seed
Adding New Seed Assets in the Organization's Assets View
Add a New Seed Asset
Adding a new seed asset to the Assets View is a straightforward process that allows you to manage and track your organization's assets effectively. This knowledge base article will guide you through the step-by-step process of adding a new seed asset. This action is essential for keeping your assets organized and up-to-date.
Steps to Add a New Seed Asset
Step 1: Access the 'Add Seed' Button
Begin by accessing the 'Add Seed' button, which can be found in various sections of your organizational interface. You can click on the 'Add Seed' button from any of the following pages:
- Configuration → Manage Seeds Page
- Executive Dashboard
- Analyst Dashboard
- Group List View
- Workspace List View
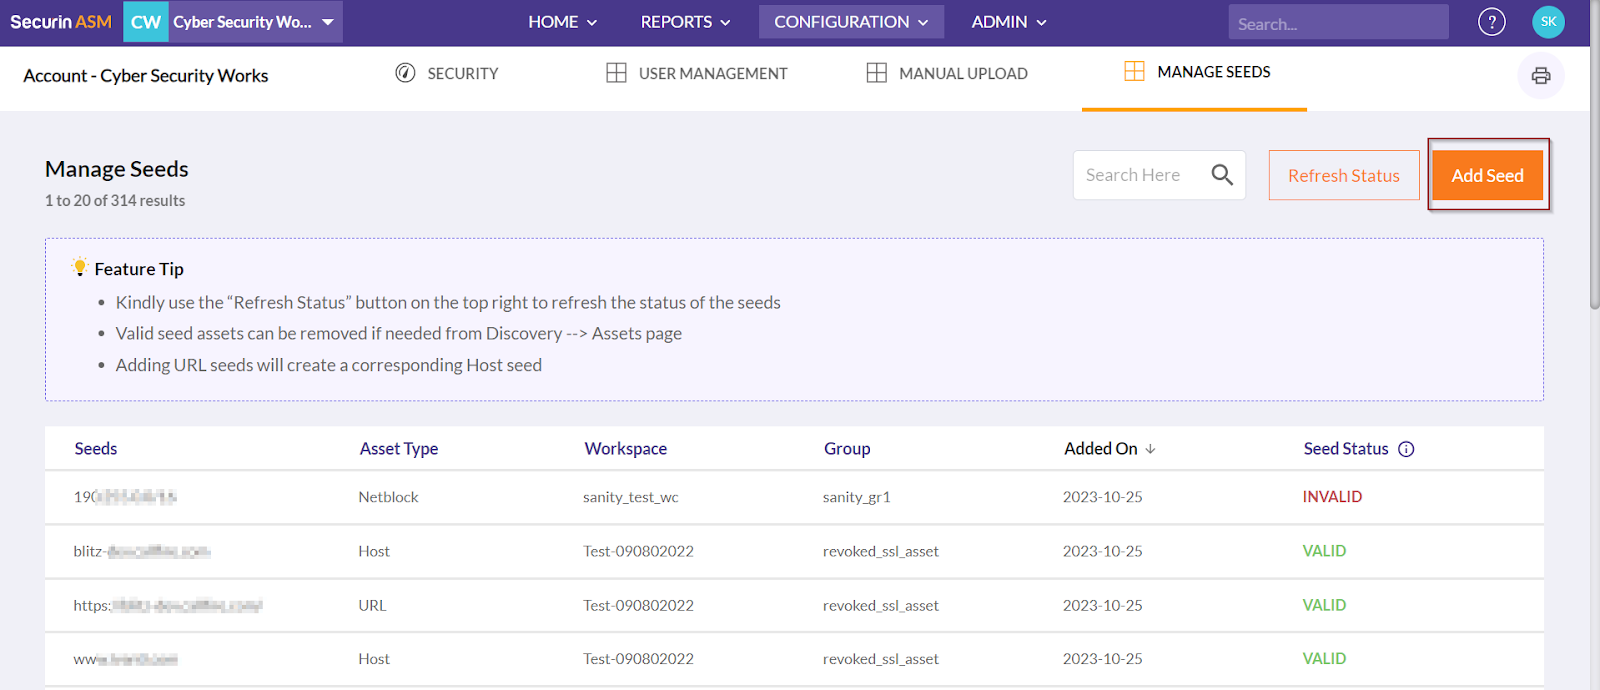
The Add Seed Button
Step 2: Open the 'Add Seed' Pop-up Window
Clicking on the 'Add Seed' button will bring up the "Add Seed" pop-up window. This window is where you will enter the details of the new seed asset.

The Add Seed Pop-up
Step 3: Enter Seed Asset Details
In the pop-up window, fill in the following information for the new seed asset:
- Seed Asset Name: Enter a descriptive name for the seed asset.
- Asset Type: Select the appropriate asset type from the available options.
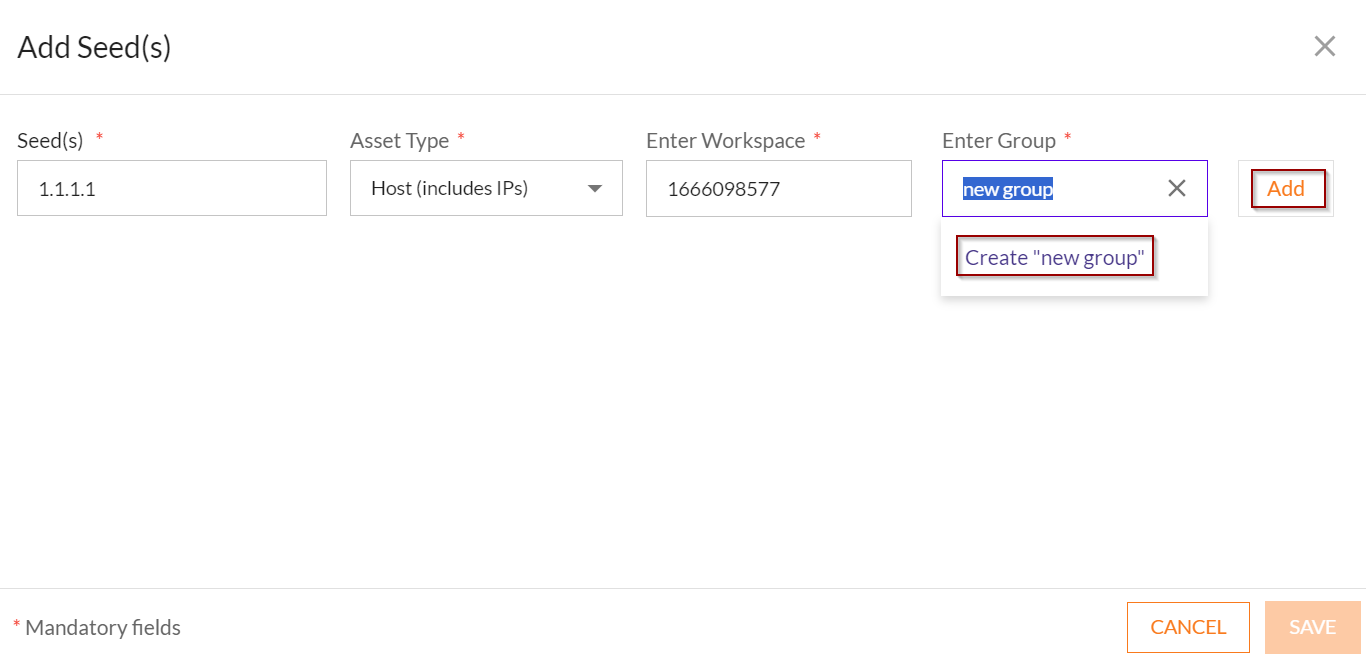
- Workspace: Choose the workspace where this seed asset belongs. If needed, you can create a new workspace directly from this pop-up.
- Group: Assign the seed asset to a specific group. Similar to workspaces, new groups can be created here as well.
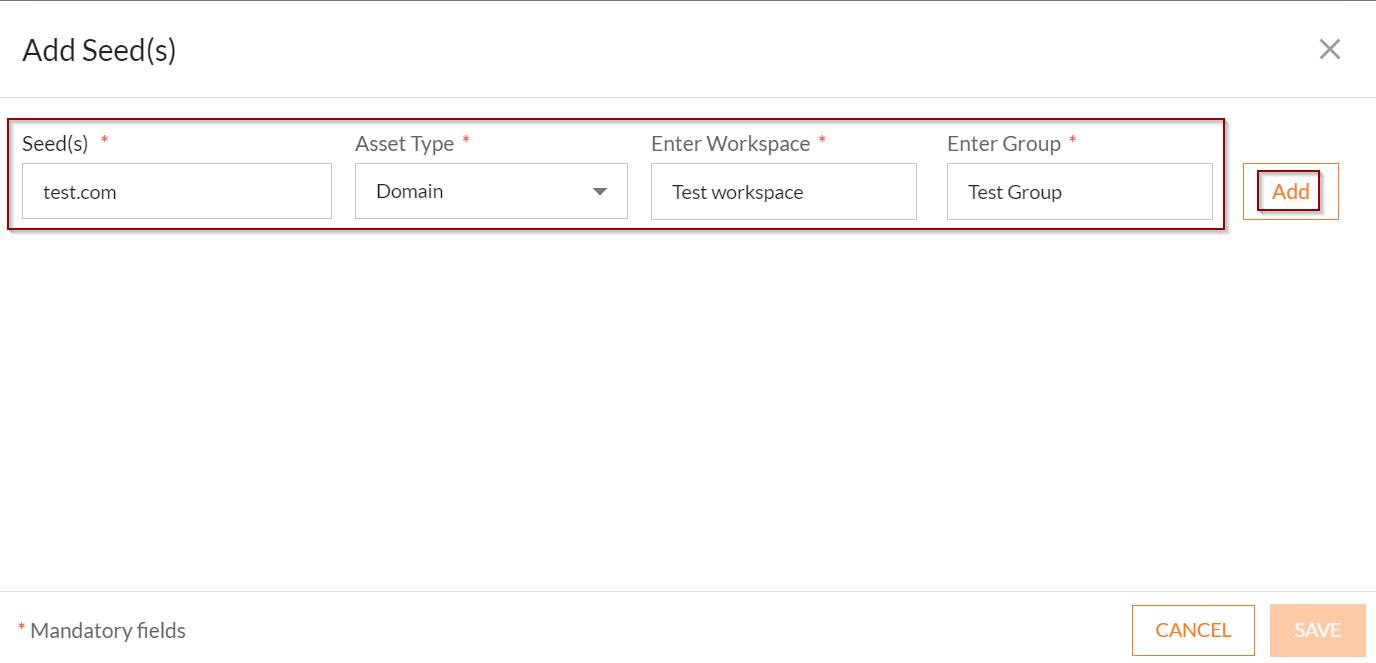
Add Seed Pop-up with Details
Step 4: Add the Asset
After entering all the required details, click the 'Add' button to add the seed asset to your organizational Assets View.
Adding Seed Assets
Step 5: Adding Multiple Seeds (Optional)
You can add multiple seed assets at once by simply entering the details of each new seed and clicking 'Add' for each one.

Adding Multiple Seeds
Step 6: Save the Newly Added Seed Assets
Once you've added all the seed assets you need, click the 'SAVE' button to save these newly added assets. This ensures that your asset information is updated and organized.
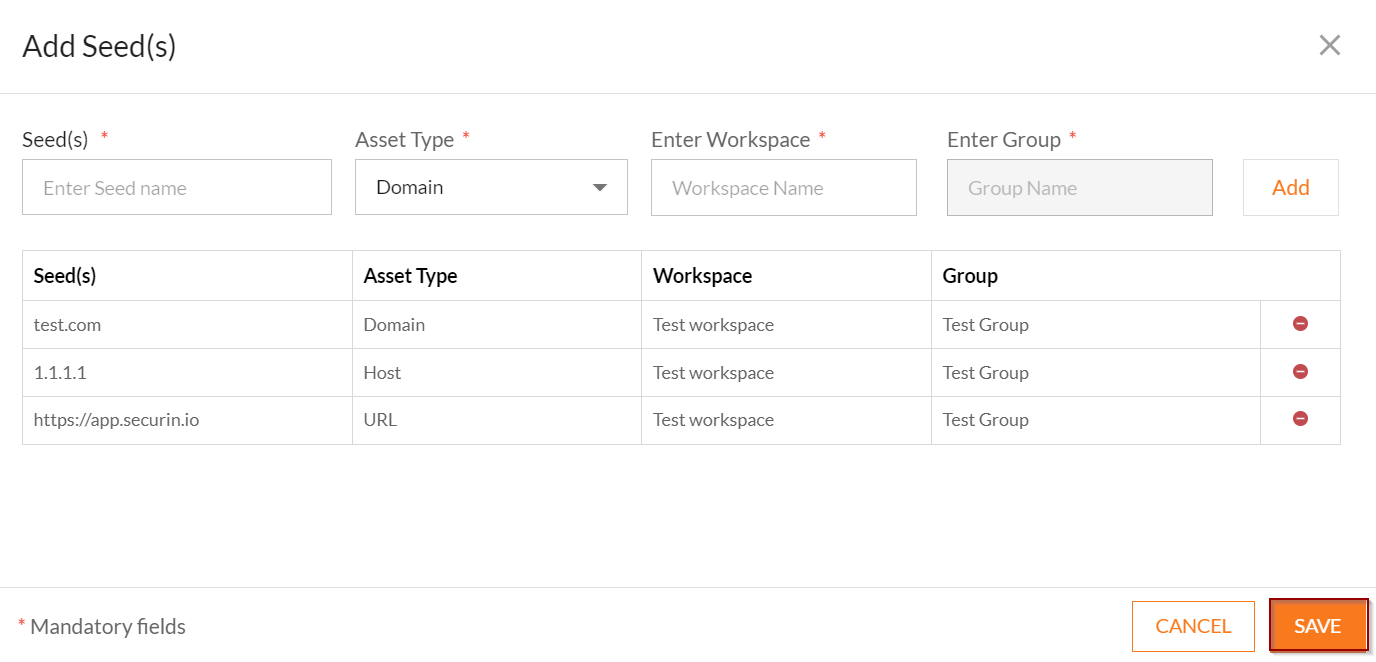
Saving the Newly Added Seed Assets
Step 7: Check the Status on the Manage Seeds Page
You can observe the status and details of the seeds you've added by visiting the 'Manage Seeds Page.' Click the ‘Refresh Status’ button to update the status of newly added seeds. Here, you can track and manage all your seed assets efficiently.
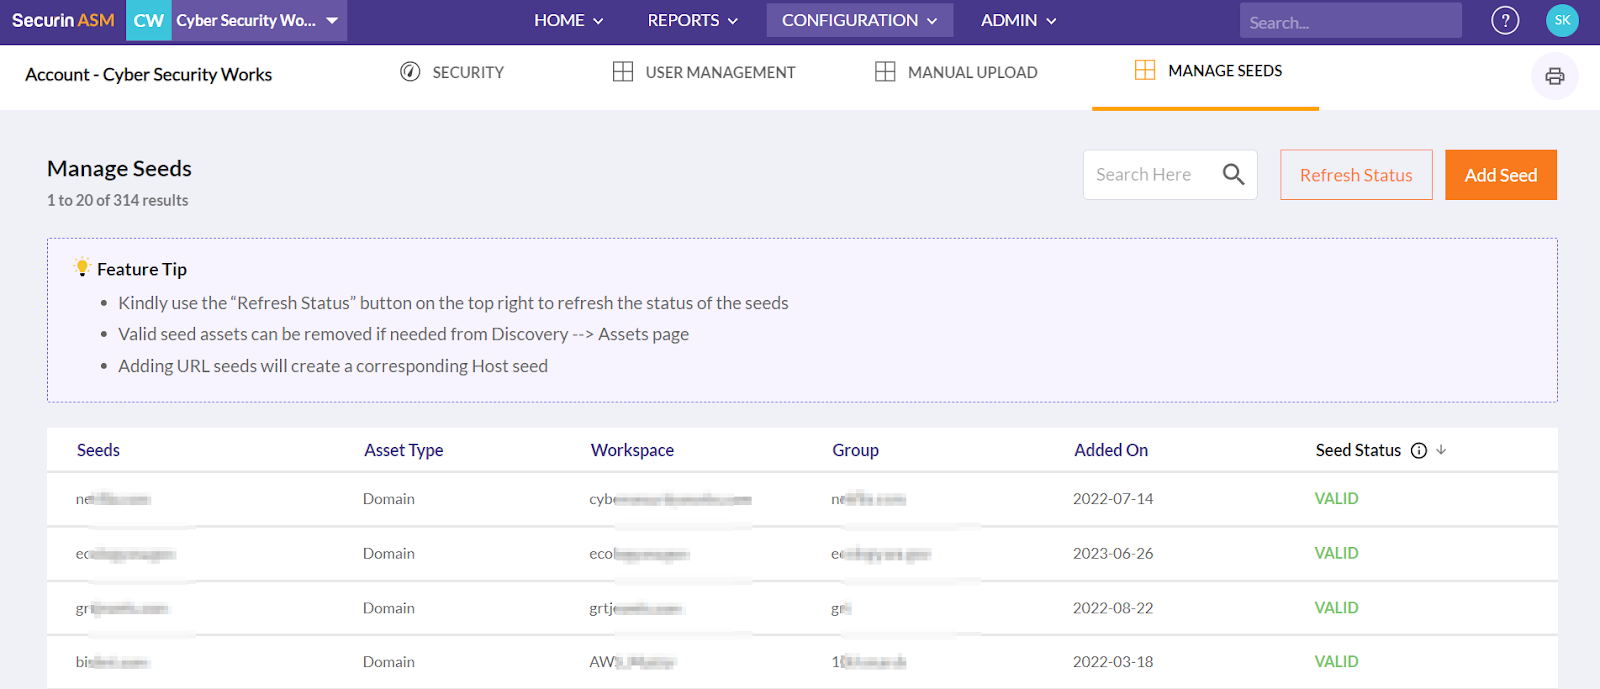
The Manage Seeds Page
Related Articles
Asset Actions - Sharing Assets
Sharing Assets Across Workspaces The Share Asset option offers a powerful solution for enhancing the visibility of assets across different workspaces. This feature provides a streamlined way to share asset details and dependencies between workspaces, ...Asset Actions - Moving Assets
Moving assets between workspaces is crucial for transferring ownership and managing asset visibility effectively. This feature streamlines the relocation of assets, including associated components, dependencies, and exposures, from one workspace to ...Seeds and Scans: A Comprehensive Asset Discovery Guide
Seeds and Scans: A Comprehensive Asset Discovery Guide In our newly designed platform, you have the flexibility to add various types of seeds to your account for asset discovery. These seeds serve as the starting points for your scans and allow you ...Asset Actions—Add Tags
In the Discovery Dashboard, you can add tags to every asset for more straightforward analysis, filtering, and verification or rescan purposes. Here's how to add tags to an asset: Click on the asset to add tags. Click the three dots icon at the end of ...Asset Actions - Refresh Assets
Refreshing assets within a workspace is a valuable action that allows you to verify and update the information associated with them. This guide will walk you through the process of refreshing assets, whether you want to refresh a particular asset or ...